Installing a Spurcycle Original Bell
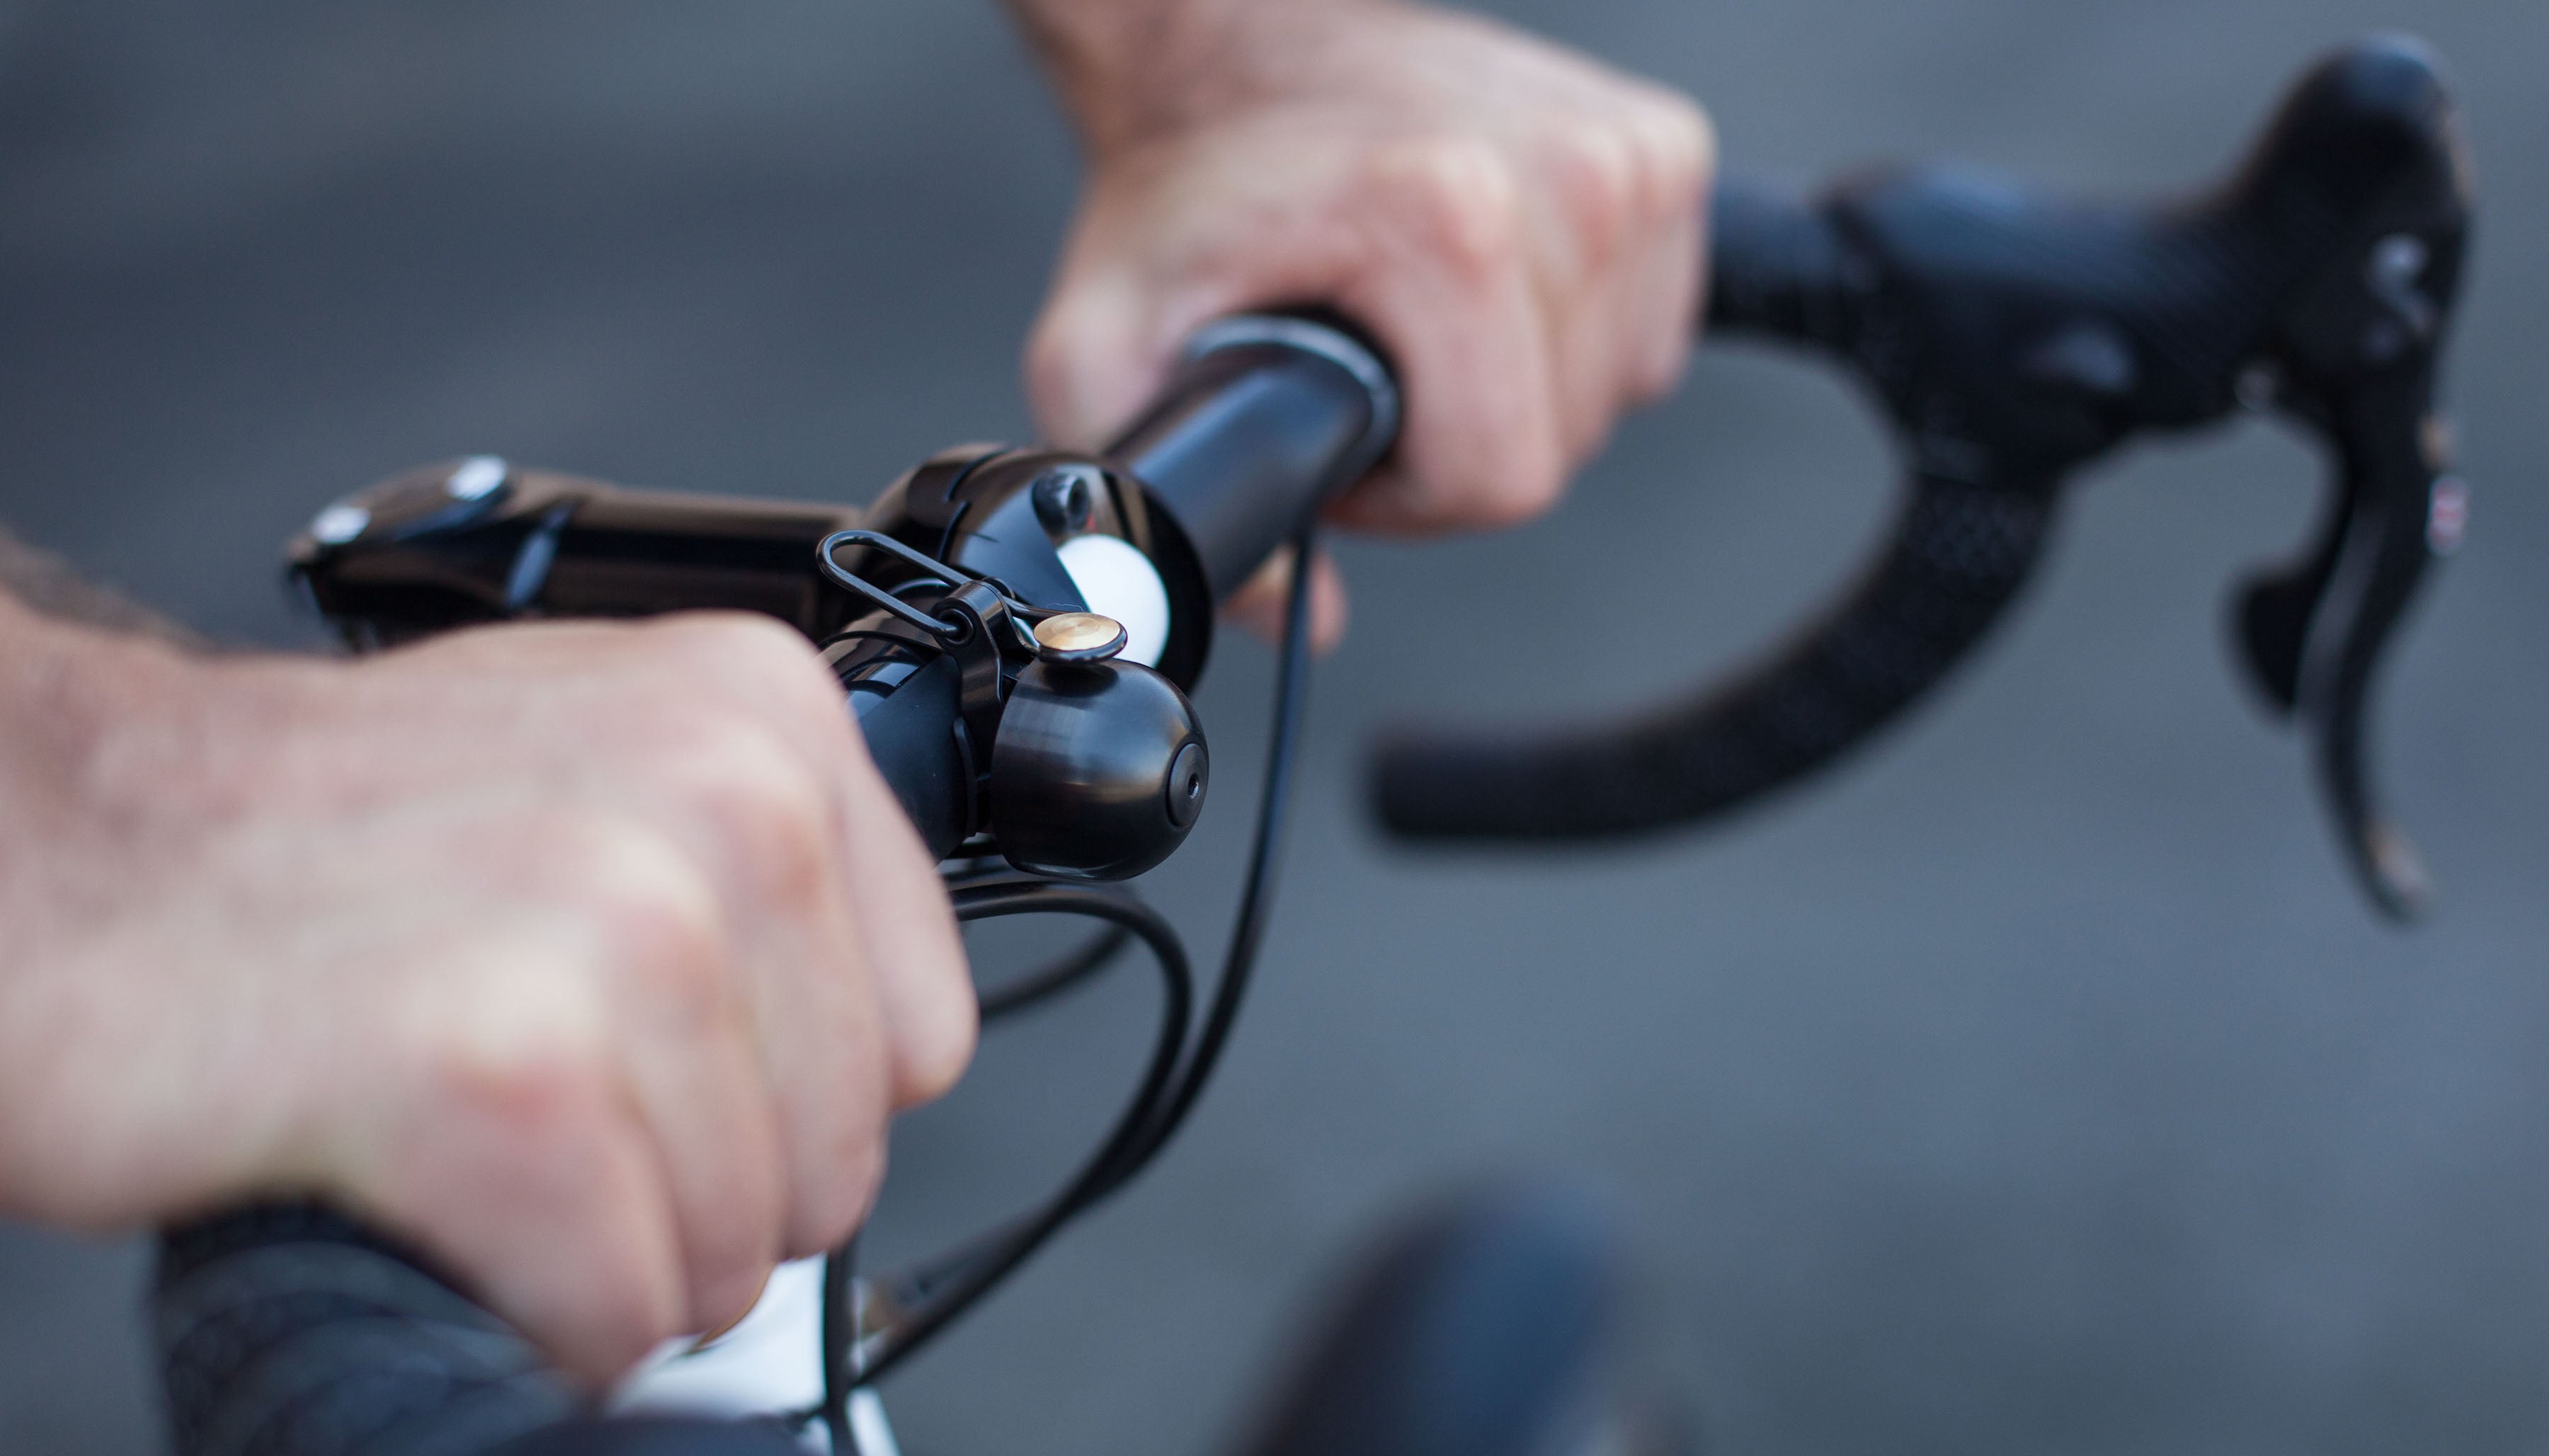
Equip yourself with a 2.5mm hex key and decide where you intend to fit your bell. It can be positioned facing forward, upright, or backward as required for best actuation and to clear other accessories.
Choose Band length
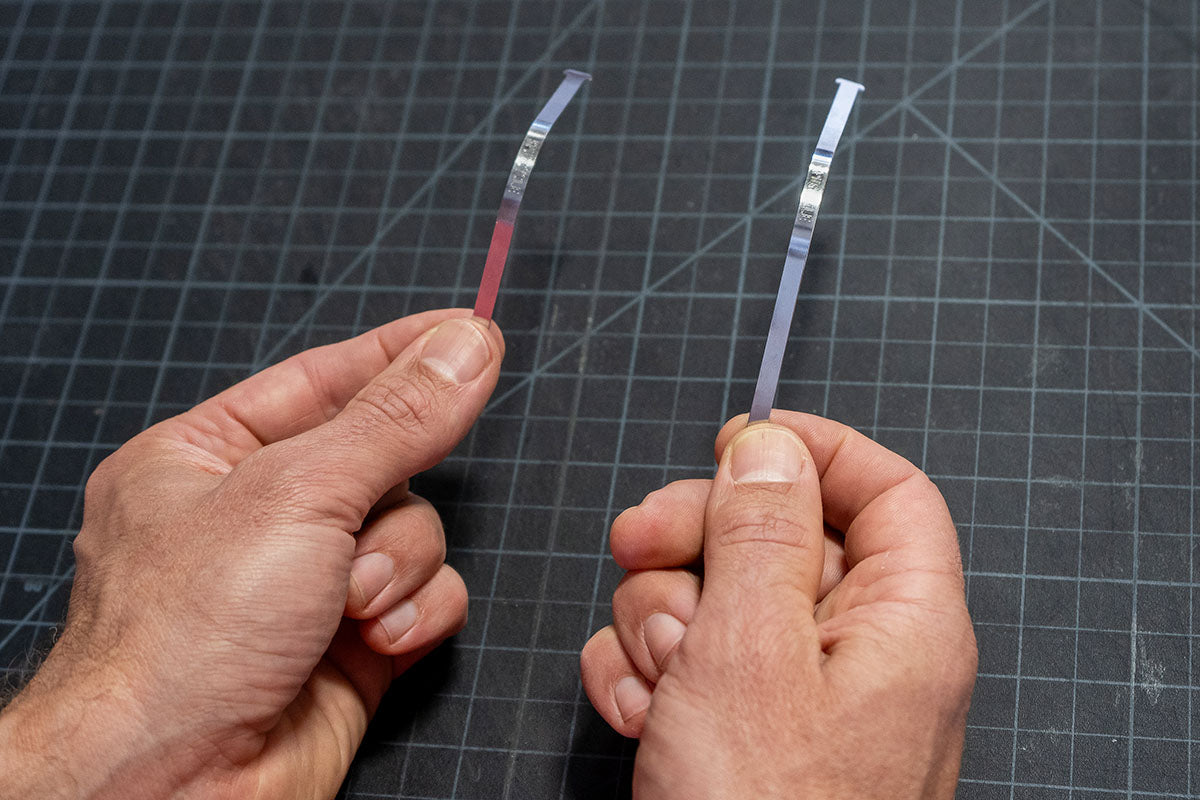
The Small Band is intended for mounting on a flat bar near the brake lever and fits 22-26mm diameters. The Large Band is typically used for mounting near the stem and fits 30-36mm diameters.
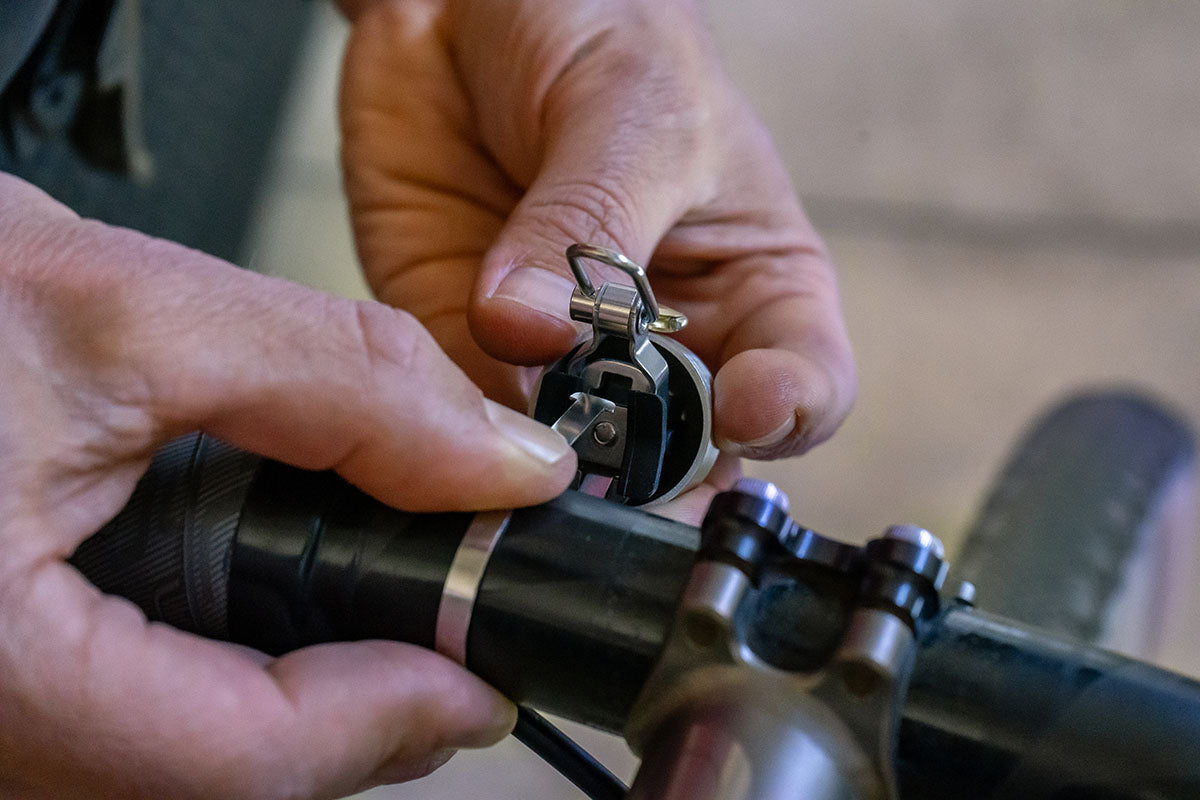
Clip Band into Nut
Make sure the Nut is visible at the bottom edge of the Dome (or this step will be more difficult). Wrap the band around your handlebar and insert one end into either T-slot. Let it spring outward and lock in place. Repeat with the other end of the band. Visually check that both ends have locked into the narrow portion of the T-slots.
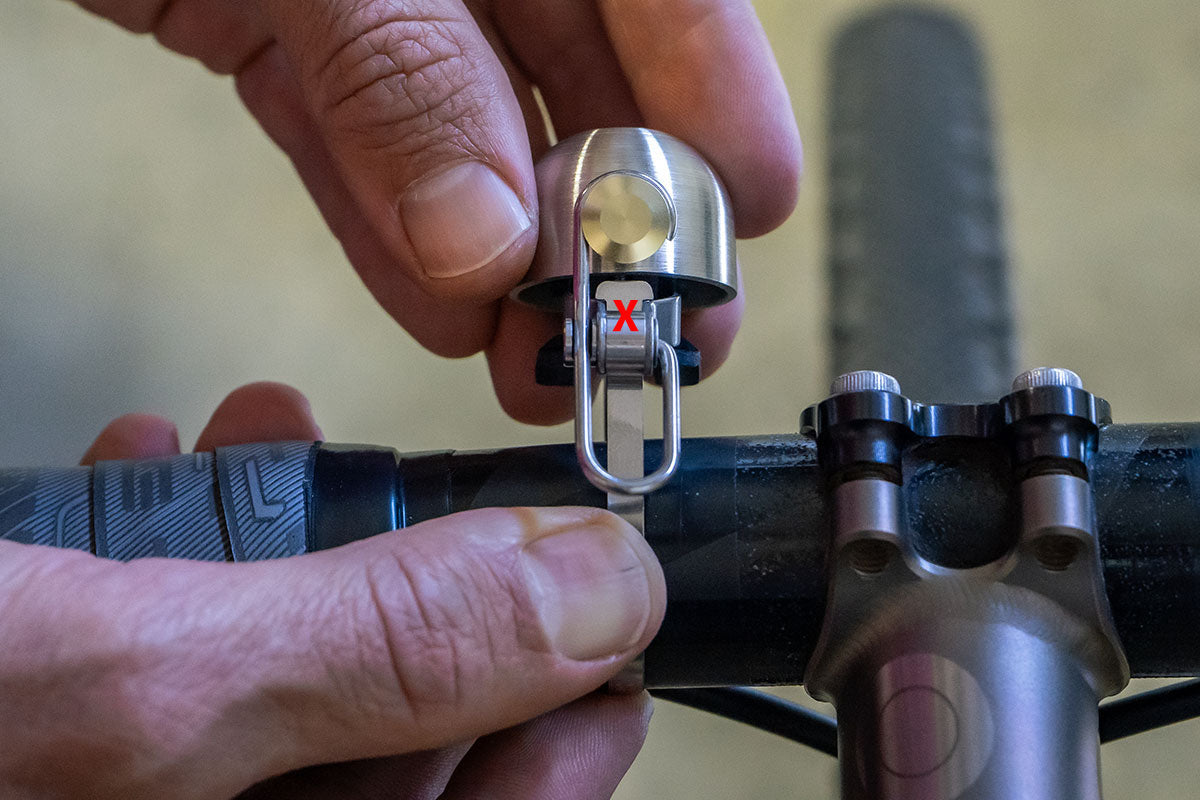
Note proper connection
Improper connection of the Band to Nut prevents secure attachment to your handlebar. If only one end of the Band is clipped correctly to the Nut, then the Band will not tighten through its normal range.
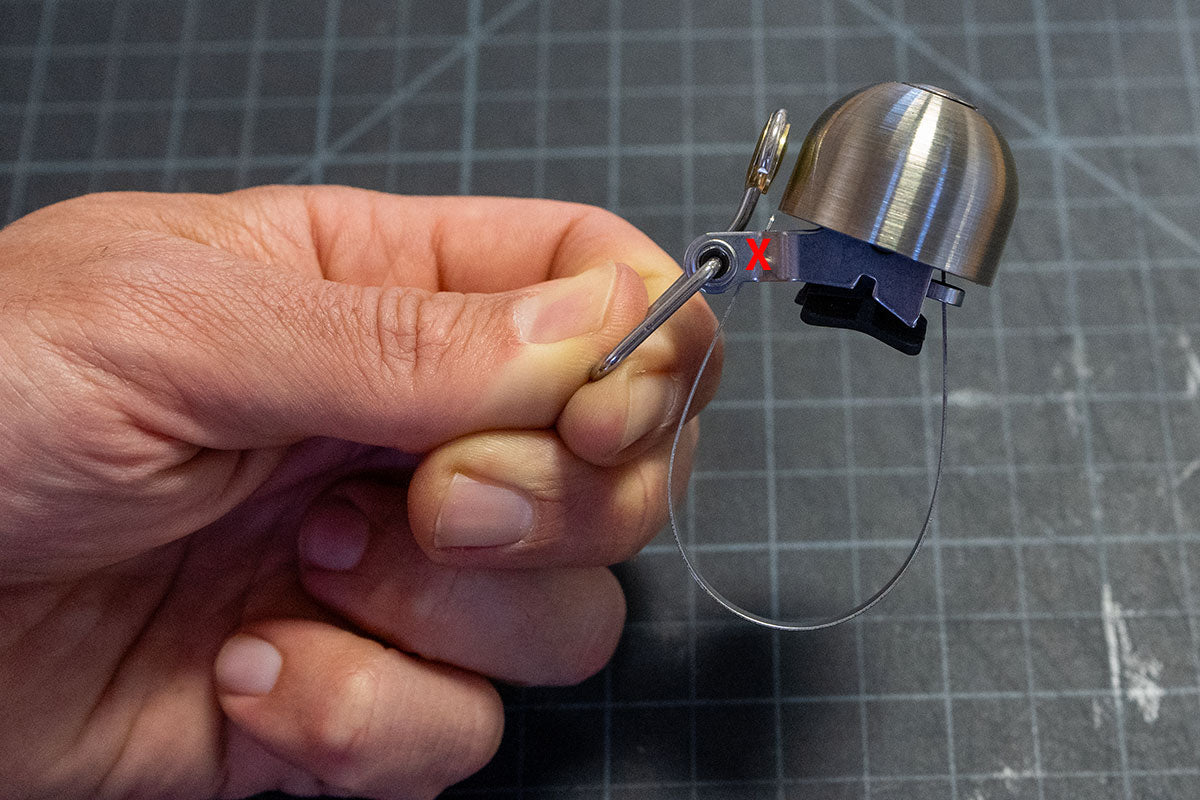
Double check
Here is another look. The Band should clip into the Nut, but might catch on the Mount instead. It's an easy mistake to make, is not secure, and should be corrected before tightening the Bolt.
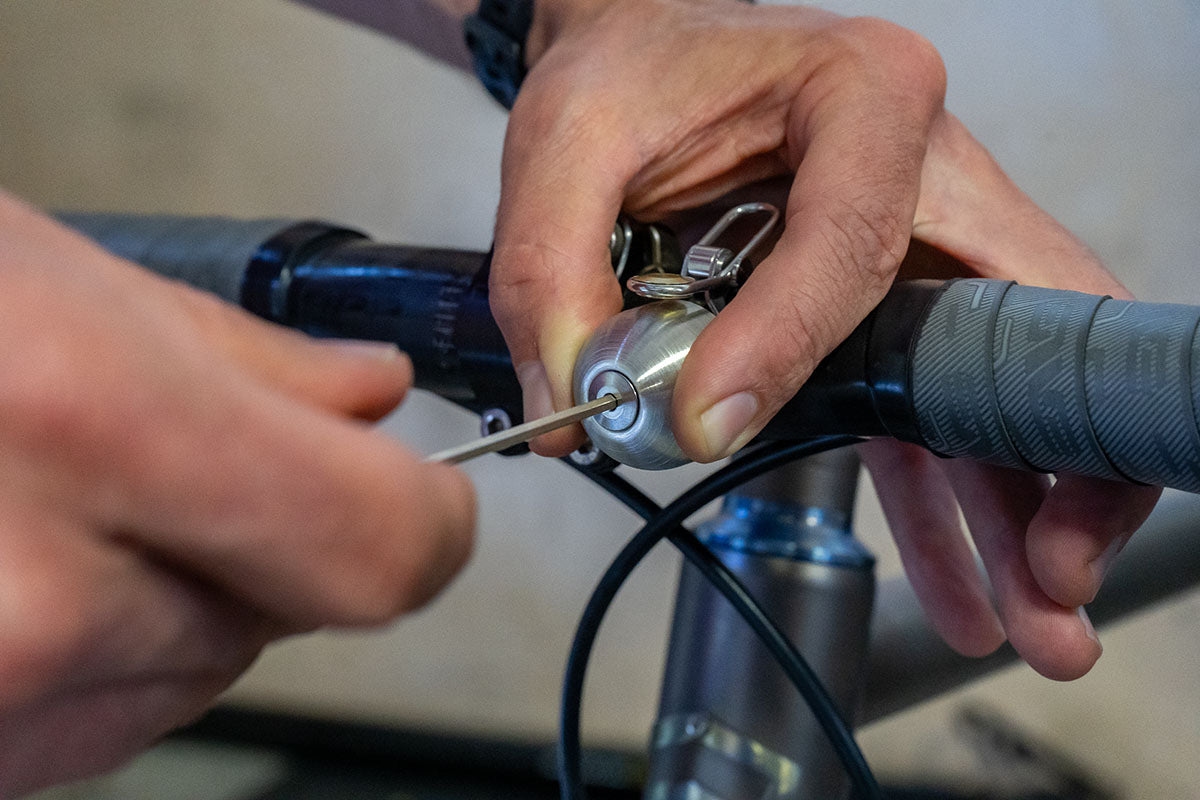
Tighten Bolt
Hold the Bell against your handlebar while you use a 2.5mm hex key to tighten the Bolt by rotating it clockwise. Before tightening fully, make sure your bell is positioned for easy access. It's also important to make sure no cables or other components are touching the bell, because this will damp the sound.

Do not overtighten
You should slowly tighten the Bolt until your Bell doesn’t rotate easily on your handlebar, then stop. The Bell should move upon impact to help prevent damage during a crash and will achieve maximum resonance if it is not overtightened. (The Nut is designed to fail first at about 3Nm, which will prevent damage to other parts and can easily be replaced.)

